xx Drying cannabis is probably one of the most important steps in growing really high quality marijuana. We’re talking the difference between really good weed and really shitty weed. Drying cannabis is so important that you could take the best genetics in the world, grow them out to their fullest potential, chop them down at the peak of ripeness—right when THC levels have maximized—and then ruin it by not drying it properly.
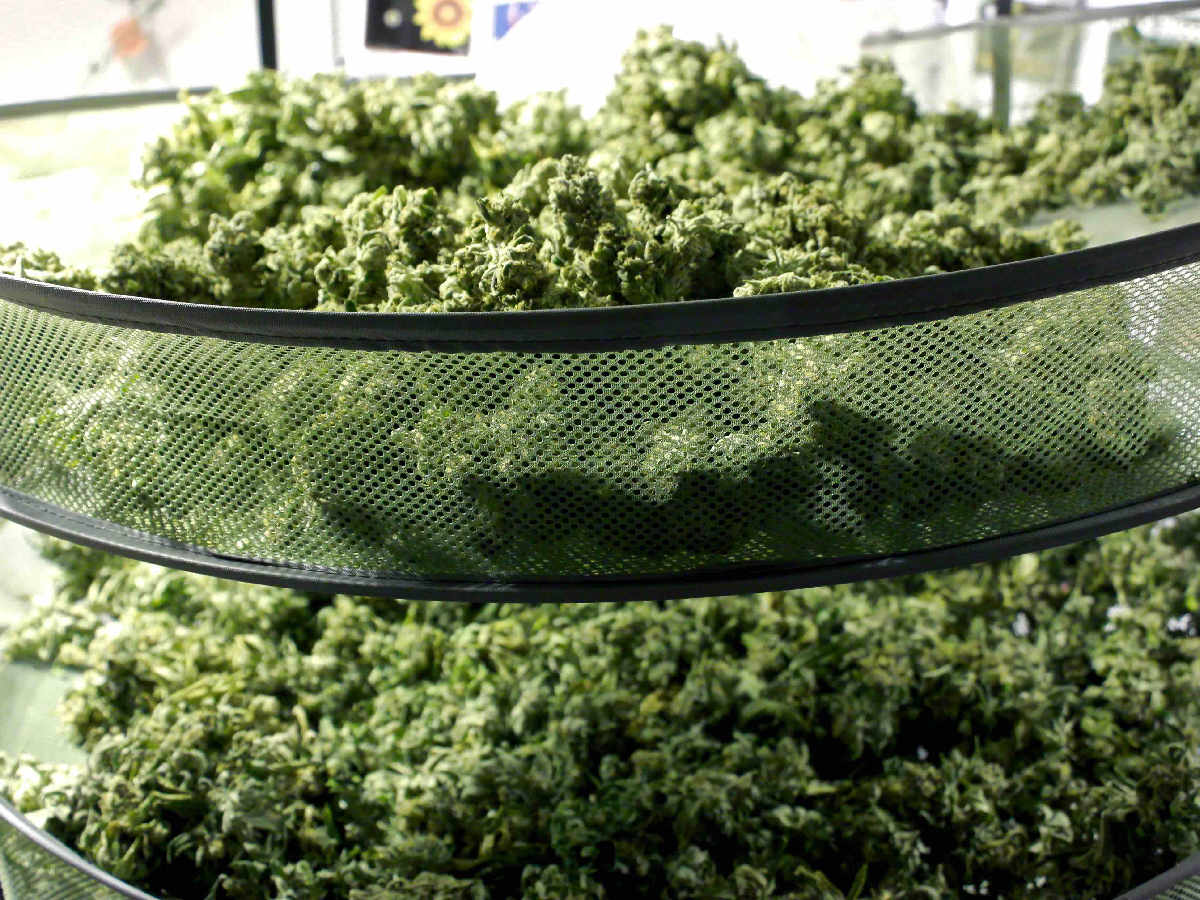
PRO TIP—save space and time with a weed drying rack
We’re not only here to help you determine how long to dry cannabis but break it down so you don’t mess anything up. Drying cannabis is simple. So don’t trip. This post will show you how to dry cannabis step by step. This way you can repeat the process successfully time and time again. But first let’s talk about why drying cannabis is so important and differentiate that step from the curing process—which is equally as important.
A lot of growers will argue that curing starts wight as you cut down your cannabis plant. Sure you could think of it this way but you’ll probably underestimate the importance of properly drying cannabis prior to curing it. If you’re cannabis isn’t properly dried prior to beginning the curing process you could increase your chances of mold or mildew setting into all that tasty fruit of your labor. So it’s import to not only treat this process as a separate step but make sure to take it seriously. So let’s break it down.
Prior to drying
When you plant reaches the harvest window it’s time to cut it down. This is where the process of drying cannabis begins. You can learn more about determining when to properly harvest your weed by checking out our post, Here’s How to Tell If Your Marijuana is Ready for Harvest. One quick tip we’ll pass on is that a lot of growers will leave their plants in complete darkness for a couple days prior to harvest. This allegedly forces them to push out as much cannabinoids as possible. Not just produce more of them but actually push them away from the plant matter itself. So you may want to incorporate this into your harvest routine just prior to drying cannabis if possible. Try it once or twice and see for yourself if this step is worth it.
Some growers also like to harvest in the dark. That’s because marijuana plants produce and push out that tasty THC during the dark hours. Once the light hits ‘em? Not so much they say. So you can also take this advice or leave it. However it seems like it’s not going to negatively affect your plants or the drying process if you harvest ‘em at night.
Prior to cutting your plants determine where and how you’re going to hang them. Drying cannabis should take place in the dark and optimal conditions. Do not dry your weed where it was grown. Whatever bug or mold may have found its way in there will stick around in there where your precious weed is drying. This just doesn’t seem like a very good situation, right? Also why not put that room to use flowering more bud, right? Time is money or in this case time is weed—which is more valuable than money. Anyhow you can dry your weed in a basement or bathroom. The garage will work as well. We’ve seen people use anything from old grow tents to old file cabinets to refrigerator boxes.
 Maintaining conditions
 Maintaining conditions
No matter what you use for drying cannabis you’ll want to try and maintain the perfect conditions—right around 60 to 70 degrees F (21°C) with between 45 and 55% humidity. You’ll start to lose valuable terpenes—you know the stuff that gives weed and other plants their unique smell and taste—at around 85 degrees. So keep conditions cooler and monitor your buds closely. If the outside is getting crispy than you’ll want to slow down the process by lessening air flow and lowering the temperature a bit. You might even consider adding some humidity. How? Keep reading.
If you need to adjust your environment you can use things like an air conditioner to cool the air and lower humidity. You can grab yourself a humidifier to raise humidity without heating the air too much. Use a dehumidifier if things get too moist and a heater if your grow conditions get too cold. You’ll also want to keep the air moving inside the drying environment. Bringing in fresh air and exhausting spen air is best if you can pull it off. You don’t want to blow dry the buds too much. This will cause them to dry out too quickly and possibly blow away some of those precious terpenes you took so long to cultivate. So make sure the fan isn’t blowing directly on your drying cannabis or it will definitely dry out too fast. This is one way to definitely screw up the drying process. So point it at a wall or something.
Also keep in mind that you want to prolong the drying process. You’re not looking to quick dry cannabis because it’ll taste and smell terrible. It’ll also most likely reduce its potency. You took the time to grow your weed properly so now take the time to reduce its dry time and you’ll be stoked. We like to slow the process down to at least a week. We’ll add a humidifier to the room if necessary. We feel that to achieve the smoothest smoke possible it’s important to not hasten the drying process. Maybe chlorophyll or something gets trapped in there if you dry your weed too quickly? Test and see for yourself? That’s really the best way to determine what works for you. We get our information from some of the best growers in the world, but what do we know?
Making your cuts
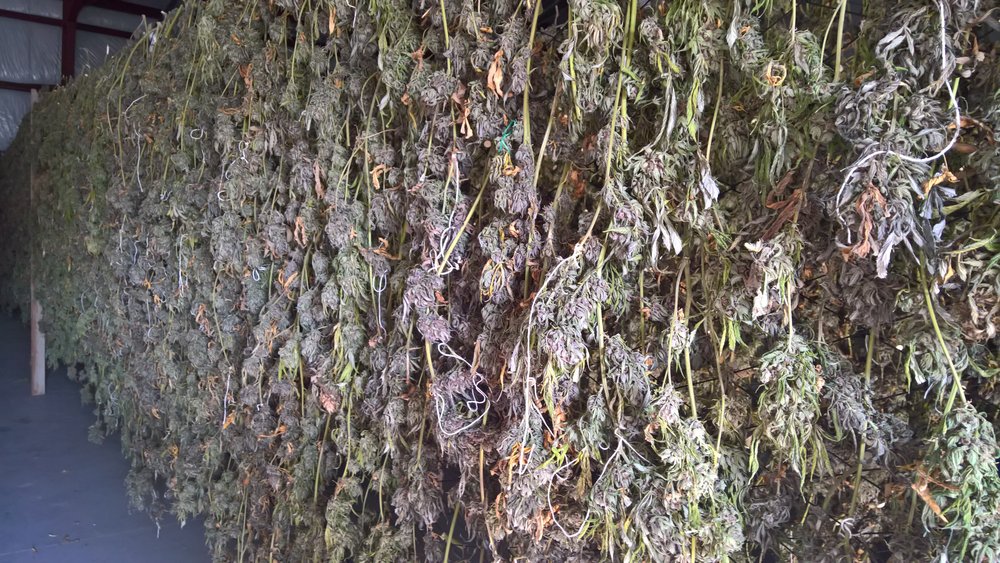
So know that you know where you’ll be drying cannabis you can determine how you’d like to cut it down. Harvesting can’t really be done too wrong—it’s basically just cutting the plant down. Some growers like to hack the whole thing down and some like to cut down branch by branch. It’s really up to you but the thing to really consider is what you’ll be using to hang your weed. Heavy gauge string or small curtain rods or poles work well for growers that like to harvest their entire plant and hang it upside down. Growers like Ed Rosenthal harvest individual branches as they finish and he hangs them in the room between his greenhouse and garage on string. At least that’s how he was doing it the last time we were at his house.
Our favorite method of drying cannabis is to chop the entire plant down, invert it and leave it to dry. Because the plant is intact it take a long time for the entire thing to dry. Like we said before the long you take to dry your plants—you know, we’re talking a week here not years—the better. So if you have the space, go ahead and chop that whole thing down in one piece and get to drying. I you’ve got space restrictions than maybe trying the branch by branch method hung on coat hangers. If space is concern we suggest going with a marijuana drying rack. These things are affordable and can be boxed up and put away when not in use.
 Some growers like Will Grinnell from Sticky Fingers Seeds cuts the buds from the plant and places ‘em in on a cannabis drying rack
, actually he has several, in a well conditioned bedroom. This was his process of drying cannabis last time we visited. Of course he’s breeding and growing weed in Hawaii so he’s using it to keep the drying process from happening too quickly. He also uses a dehumidifier to control the humidity in the environment if things get too moist. The result? Some super tasty bud. Have you ever tasted those fiery sativas like Maui Dream and Sunshine DayDream from Hawaii. Talk about Maui Wowie, dude.
Also make sure that if you’re going to cut off the individual bud and dry it method to rotate the bud a few times as it dries. This isn’t the best way to dry cannabis but it is definitely one of the most space-saving techniques. Drying cannabis this way takes a bit more monitoring. That’s because if your buds stay on one spot too long they’’ll develop a flat spot. Moisture could also accumulate between the bud and then surface it’s resting on. Moisture just sitting there like that is always a bad thing, drying cannabis or not—it’ll lead to mold and mildew and you simply don’t want that. So monitor your marijuana drying properly, yo.
Some growers will place their buds on newspaper. If you go this route just make sure to monitor your buds to see if their sitting in wet spots. You’ll also want to avoid flat spots. Some big colas, even some smaller nugs have enough wait in them to crush those precious THC crystals they are lying on—so make sure to rotate ‘em because you’re not only fighting humidity and moisture you’re also battling gravity, dude.
Harvesting individual buds or branches as they ripen or harvesting the entire plant at once, keeping it intact and inverting—what matters most is monitoring the harvest to ensure it isn’t drying too quickly. We suggest trying to hold out for at least seven days before moving on to the next step.
Also we suggest that you cut all the fan leaves off the plant before harvesting and drying. Sure having those extra leaves on there will slow down the drying process—exactly what we’re trying to accomplish—but all that plant matter encourages mold and rot issues. You’re not going to need those big fan leaves so just get rid of them. They’re going to do nothing for the drying. You can also trim a lot of those extra leaves on the plant as well. This process is known as wet trimming and is a definite time-saver. You can hack off these leaves easily because they’re still perpendicular to the plant. Once those things start to droop they’re a lot harder to cut because they’re resting your your precious buds. So taking the time to snip all this extra growth off while the plant is still alive is easiest. Why hold the plant and work on it when it’s already being held by the growing medium, right?
When drying’s done
 When drying’s done
When is the drying process finished? Good question. When drying cannabis you have to pay particular attention to twigs. Twigs? Well what you’re really looking for is those when those tiny branches snap in half. We’re not talking bending—actually snap. You’ve probably broken a pencil, right? Same thing with these small branches. The smaller ones will dry out faster than the bigger ones of course because they contain less moisture. So testing those first makes sense. As they become brittle compare them to larger branches. If the medium sized branches are bending—you’re good. If they’re brittle and it’s only been a day or two then you’ll want to slow down the process. We’ve talked about this above but you’ll basically want to reduce heat and add humidity.
Once it’s been at least four to five days and those medium branches start to snap, those bigger once will still bend—it’s time to move on to the next step. Break out some glass jars and get to curing. Once you’re done you can even get into freeze drying cannabis for long term storage. For more information check out our primer on how to cure weed so you can continue the process to creating killer home-grown cannabis.
Anyhow the outside of the buds will be dry to the touch when they’ve finished the drying process. This is important. We’re not talking crumbly and brittle just dry to the touch. This is especially important when you’re drying buds that have been trimmed off the branch. This is one reason why we keep our buds on the branch—it’s easier to test to see if they’re done.
If your buds are dried and it’s only been a two or three days, don’t worry, dude. Know you know what to do next time. You can probably re-hydrate that herb a bit using a Boveda 62-Percent Humidipack and still turn it into some primo smoke. Most important however is to learn from your previous experience, make some adjustments and refine your technique. Growing weed is a process and things are always changing. So you’ll most likely always be facing a new set of challenges that you’ll need to overcome—that’s one of the reasons growing weed is such a challenge but so rewarding. Just because it’s called weed, doesn’t’ mean it grows like one. But if you don’t take the time to dry your cannabis properly it’ll definitely taste like one. So you own it to yourself to dry that shit right.
Yes you can sample your bud at this stage because it’s dry enough to burn. Keep in mind you have yet to continue to step two—curing weed. Arguably nailing this is even more important than getting the drying right. If you do choose to try your weed at this stage just know that the smell, taste and potency are optimal yet and your get a harsh hit. Don’t feel bad, dude, sampling is part of the process. If a cook doesn’t taste the stuff they’re making than how are they to improve let alone know what their dish is going to taste like before it’s served? So feel free to try it now, but just know that it’s going to get even better. A lot better actually. Because the next stage continues to move that moisture and “green smelling” chlorophyll stuff out of the bud. This leaves you with the best-tasting and burning bud you can possibly grow.
Sure it takes longer to prolong the process of drying cannabis. But drying cannabis slowly is the best practice. You want to maximize your buds potential so don’t blow it right before you get to the finish line, dude. Properly drying cannabis and monitoring it closely is all part of the process to growing killer weed. If you want really tasty and really stinky weed then you’ll need to take the time to dry it properly and like we said—that takes time. At least half of the quality of your bud will be determined by the drying process and what you do afterwards. So take your time, dude. And read our post about curing cannabis properly to ensure you make the most out of your marijuana harvest.
Have any tips or tricks on drying cannabis? Let know about ‘em in the comments section below.
Leave a Reply